
Instructions to build a simple barrel stove for fast, easy bud drying. No electricity required! Eliminate mold problems in the drying room.

Faced with rain and high humidity, many strains of cannabis are prone to the grey/blue mold known as Botrytis. This destructive fungi ruins buds and spreads fast. The danger doesn’t end at harvest time, though—mold outbreaks can happen during the drying process. So it’s important to keep the area dry and clean.
Some of you have electricity and can run a dehumidifier. But if you’re living without power, that doesn’t mean you’re without options. Below is a DIY method for making a barrel stove out of an old propane tank.
First, let’s learn about what causes mold in cannabis.
Why is there mold in my cannabis?
Several factors cause mold to grow in cannabis:
- High humidity – High humidity is the leading cause of mold damage in cannabis. The fix is easy indoors with ventilation and humidity control, while outdoor growers are subject to the weather.
- Ideal temperatures – Botrytis grows at 60–75ºF (15–24°C), a pretty average temp range to avoid. Raising the heat above this will prevent spores from germinating.
- Poor air circulation – A lack of air circulation creates the type of climate that mold thrives in. Under-ventilated greenhouses or stuffy homes are problematic.
- Unsanitary practices – Mold spores can reside on many things around the home, especially overripe organic matter like fruit on the table or food in the compost bucket.
- Damaged plant tissue – Dead plant tissue creates a habitat for mold to grow on. Once established, the mold spreads quickly onto everything around it—even infecting healthy tissue.
Dying Cannabis Buds with No Electricity
Knowing what we have learned about the causes of moldy buds, cannabis growers living off-grid or with limited electricity will still need to create a good mold-free environment for drying.
Dehumidifiers are quite helpful in creating a dry, stable environment in the drying room, but not everyone has the means to use them. A common dehumidifier draws about 300–700 watts of power, which is a lot when you’re using a solar-powered battery bank or small generator.
The “hillbilly” alternative to a dehumidifier is the barrel stove, or homemade wood stove. Converting an old barrel or propane tank into a fully functioning wood stove can be easily done by yourself at home and will provide your drying room with three major advantages:
- Rapidly dehumidifies the area – Barrel and propane tank stoves don’t take long to get hot: the thin metal heats up quick. This emanating heat dries out the room fast.
- Sustained heat – The sustained heat created by the stove helps prevent mold from appearing. Keeping the room’s temps constantly over 75ºF (26ºC) will prevent new mold spores from germinating.
- No electricity needed – Once it’s set up, all you need is wood to burn. What do you do if the power goes out, your solar bank is drained, or the generator doesn’t start…? Get back to basics.

Using welding equipment for cutting out a barrel stove is the best option. A Sawzall can work too. It’s what I used. Not as pretty, but it works.
Tools needed:
- Sawzall
- Hammer
- Electric drill
- Aluminum foil
- Chimney pipe
- Scrap tin
- Barrel or old propane tank (you’ll want to rinse it out a few times to make sure there’s no gas in there!)
DIY Propane Wood Stove Instructions
- Drill out some holes at the corners of the firebox entrance in the front. Then some more holes at the top where the chimney will be. The holes should be big enough to fit the Sawzall blade in.
- Come in with the Sawzall blade, starting at the holes you made and cut out sections for the firebox and chimney. On the top, it should be cut out slightly narrower than the chimney pipe to fit snug.
- Push in the chimney pipe and if you can reach it, get on the inside and hammer it flush to the barrel. You can stuff any gaps with aluminum foil.
- For the chimney cap, a single piece of scrap tin can be used: cut, bent to a 90° angle, then drilled into the top of the chimney pipe.
- The door is optional but a good idea for safety. Most of the time, we just put a metal screen over it. If you want a door, you can use another piece of scrap tin, cut to fit and bolted on.
- Have a large cinder block, concrete, etc., to keep the stove base off the floor because the barrel will get hot!

While the method described above will give you a basic, low-quality wood stove for next to nothing, building a superior creation is easy with the right equipment. A step-by-step, photographed do-it-yourself guide can be found here—http://homesteadlifestyle.com/diy-propane-tank-wood-stove/
There are also barrel stove kits for sale that include all the parts. Building a good barrel stove is easier if you buy a barrel stove kit. All you need to obtain is the kit, chimney pipe, and a 30 or 55-gallon barrel.
I recommend staying away from the super cheap barrel stove kits because the parts frequently have heat-related issues. They are made with low-quality, extremely thin steel.
 The Vogelzang Deluxe Barrel Stove Kit is made of durable cast iron construction that fits onto a 30 or 55-gallon barrel.
On the bottom, there’s a separate clean-out door to get rid of your ashes easily. It’s a real improvement over the single-door types that give owners a back-breaking challenge when it comes time to remove ashes from the stove.
The cam-lock style latches stay cool to the touch, along with two spin dial draft controls that make for easy adjustments. Simply the best quality for the price barrel stove kit.

Air circulation
If you are lucky enough to have access to electricity, then ventilation/fans are valuable to have in the drying room. Mold prefers to grow in still, stuffy air, so keeping the air moving is important for a healthy harvest.
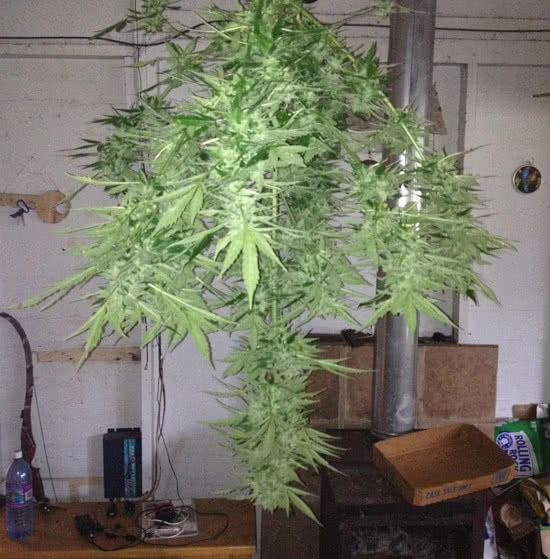
Clean and trim your hanging cannabis buds as soon as possible. Vigorously inspect them for damage and remove any brown, dead material, as these may easily become infected with Botrytis and will rapidly spread to other buds and branches.
Although… blowing air saturated with humidity onto drying buds will not do much good and could actually make matters worse, ensure that your drying room is at a reasonable humidity level is a necessary first step.
Beware of mold spores already present in your room, as they will become airborne and can infect your buds. Common suspects include old foods, fruits, musty books, and potted house plants.
Using a wood stove in a room will naturally create a draft, yet another positive thing about installing a homemade wood stove. Depending on the temperature outside, you may consider opening windows to create more of a draft.

A common mistake of using a wood stove is to try and dry the buds as quickly as possible. The “flash drying” methods are known to produce inferior buds. Any sticky resin dries up and gets powdery, making a harsh, unpleasant smoke.
Hang the cannabis branches far enough away from the stove so that they can carefully slow dry—no need to rush here. You’ll want to keep the fire stoked for a couple of days if you are dealing with the rain, but all that hard work will pay off—there’s nothing like the good feeling you get when you produce top-quality marijuana in the most difficult weather conditions.
By now, you should have an idea of how to make an ideal drying room for cannabis. Good luck and Aloha!

Read next: 3 Most Common Fails of Growing Marijuana Outdoors


I agree with all of it except for one point – raising the temperature of the drying room.
Herb comes out better when dried in a cooler environment, not a warmer one.
Just my .02
cool (no pun intended) lol. Thanks Jason!